LED panel design is the planning and configuration of modular LED video tiles to create seamless visuals for stages, dance floors, and event spaces. It defines pixel pitch, brightness, layout, rigging, power, and content workflows so your wall looks crisp and performs safely. For Midland couples and planners, great design turns a room into an immersive story.
By Revel Entertainment · Last updated: 2026-07-05
Above the Fold: Hook + Table of Contents
Designing an LED wall starts with the room, not the tiles. Map sightlines, viewing distance, and rigging first; then select pixel pitch, panel count, and processor. Lock power and safety clearances, storyboard content, and rehearse. This order prevents moiré, blown circuits, and awkward aspect ratios.
You want a wall that feels alive, photographs beautifully, and never distracts from the couple. Here’s how we approach LED panel design for South Asian weddings—baraat to afterparty—using one integrated entertainment and production team.
- Quick Summary
- What is LED panel design?
- Why it matters for weddings
- How LED walls work at events
- Types, layouts, and approaches
- Best practices (2026)
- Tools, specs, and resources
- Case studies and examples
- FAQ
- Conclusion + next steps
Quick Summary
Smart LED panel design aligns viewing distance, pixel pitch, nit levels, and content with the room’s realities. Pair the wall with lighting, DJ/MC cues, and camera settings, then build redundancy and safety into rigging and power. The result is immersive visuals that elevate every moment.
- Start with the room: Measure trims, distances, and sightlines before panel math.
- Pick pixel pitch by view: Indoors, 2.6–3.9 mm suits most ballrooms.
- Balance brightness: 800–1,200 nits indoors; higher for outdoor daylight.
- Design content: 16:9 hero walls for story; panoramic banners for ambiance.
- Lock logistics: Rigging capacity, power distribution, safe egress, and rehearsed cues.
What Is LED Panel Design?
LED panel design is the methodical process of choosing pixel pitch, brightness, dimensions, and rigging to build seamless video surfaces from modular tiles. It aligns content aspect ratios, power distribution, safety rules, and show control so the wall looks sharp at the intended viewing distance.
In practice, LED walls are built from tiles (often 500 mm by 500 mm) that lock together. A well-designed wall matches camera lines, avoids moiré, and hits the right nit level for the ballroom. Pixel pitch commonly ranges from 1.5–3.9 mm indoors; smaller numbers mean higher detail. A 2.6 mm wall typically looks crisp from 9–12 feet away, while 3.9 mm can look clean from 12–18 feet depending on content.
We engineer walls around the couple’s story and the room. For sangeet performances, a 16:9 canvas keeps choreography centered; for receptions, a panoramic 32:9 banner can frame the sweetheart table. The planning also defines processor, playback, redundancy, and whether we need ground support or flown truss. When the DJ, MC, lighting director, and LED op follow one cue stack, scenes feel fluid and intentional.
Key components explained
- Tiles/cabinets: Modular panels containing diodes, receiving cards, and power supplies.
- Pixel pitch (mm): Distance between diode clusters; sets perceived detail at distance.
- Brightness (nits): Light output; match to ambient lighting so faces look natural.
- Processor/scaler: Maps input resolution to the exact panel layout with correct refresh rates.
- Rigging/ground support: Truss or base frames designed for point loads and safety margins.
- Power distribution: Balanced circuits, appropriate connectors, and clear cable paths.
- Content workflow: Storyboards, motion graphics, and playback timelines tied to key moments.
Want to see how visuals and lighting combine? Our designer lighting guide shows the palettes that complement motion content and flatter skin tones under cameras.
Why LED Panel Design Matters for Weddings
Thoughtful LED design transforms a venue without overwhelming it. The right pixel pitch, nit level, and content palette amplify entrances, speeches, and first dance moments—while protecting sightlines, safety, and photography quality.
Weddings move fast: baraat energy, cocktail chatter, speeches, performances, and a late-night dance floor. Each scene needs visuals and lighting that shift in seconds. Indoors, 800–1,500 nits keeps content readable under stage lighting; outdoors, 3,500+ nits may be necessary in daylight. Balanced brightness prevents guests from squinting and photographers from fighting exposure. Refresh rates in the 1,920–3,840 Hz range reduce banding on cameras that shoot around 1/50–1/60 shutter speeds.
Design also manages risk. Proper load calculations protect truss, correct circuiting prevents nuisance trips, and smart content choices avoid flicker on cameras. With one team across DJ, MC, lighting, LED walls, and logistics, cues land together—no gaps between vendors. This is exactly why our Indian DJ guide emphasizes unified show control for South Asian receptions.
Common mistakes to avoid
- Picking pixel pitch by spec sheet alone: Always measure viewing distance and camera angles first.
- Over-bright content: Pure white frames or harsh flashes can blow out photography highlights.
- Clashing palettes: Busy visuals fight with uplighting and florals; use soft gradients and tasteful motion.
- Poor rigging planning: Ignoring point loads or ceiling limits leads to last-minute ground support compromises.
- Vendor silos: Separate teams for DJ, lighting, and LED introduce timing drift and missed cues.
How design impacts photo and video
- Refresh and shutter sync: Match panel refresh (≥1,920 Hz) with camera shutter to reduce scan lines.
- Color balance: Calibrate the wall to the room’s white point so skin tones look natural on camera.
- Headroom for highlights: Cap peak white at ~85–90% so photographers maintain dynamic range during entrances and first dances.
For baseline lighting context that pairs well with LED visuals, see this overview of professional event lighting design.
How LED Walls Work at Events
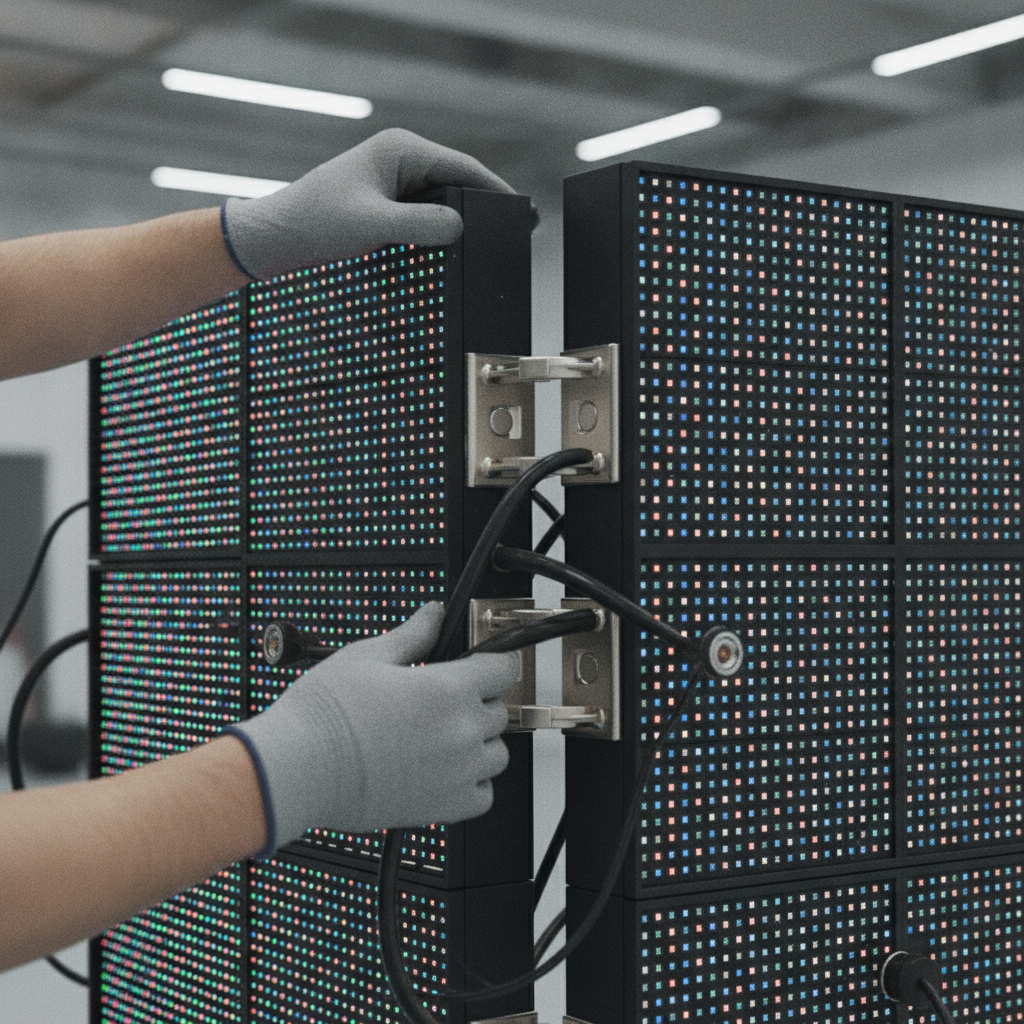
An LED wall chains modular tiles to a processor via data and power. The processor scales video to the exact panel map, then sends synchronized frames to each cabinet. Proper cabling, redundancy, and power distribution keep images stable through the whole show.
Each LED cabinet contains diodes, receiving cards, and power supplies. Tiles connect via locking mechanisms; data typically runs Cat6/Cat7 to the processor; power distributes via powerCON or tie-ins. A video processor accepts HDMI/SDI and outputs mapped data. Refresh rates of 1,920–3,840 Hz help avoid visible scanning to the naked eye and on cameras. We also design for failure tolerance: spare power supplies on-site, extra tiles pre-addressed, and dual-home data runs. Power plans specify amperage, phase balance, and feeder distances to keep voltage drop in check.
Step-by-step design workflow
- Room reality check: Measure trim height, throw distances, stage depth, and sightlines.
- Select pixel pitch: Match to viewing distance using a 3–4× rule-of-thumb (feet ≈ mm × 3–4).
- Choose layout: 16:9 hero, panoramic banner, flanking towers, or mixed.
- Plan rigging/ground support: Validate point loads, safety factors, and access for load-in.
- Map power: Balance phases; specify circuits; confirm distro/generator needs outdoors.
- Design content: Storyboard moments; set frame rates (59.94 fps) and color palette.
- Rehearse cues: Align DJ/MC hits, lighting looks, and wall content in a single cue stack.
- Build redundancy: Spare tiles, PSUs, and secondary data paths ready to swap in seconds.
For a bigger view on how this integrates with the rest of your show, explore our event production guide and our approach to full‑service event production.
Redundancy and risk management
- Spare tile strategy: Keep 5–10% additional cabinets pre-addressed and tested.
- Power resilience: Separate circuits per column; label clearly to speed swaps.
- Data backups: Dual lines to critical sections; keep spare receiving cards ready.
- Operational roles: One caller coordinates DJ, MC, lighting, and LED ops so cues don’t drift.
For deeper technical intros to panel behavior, compare these explainers on architectural LED light panels and how LED panels work in practice.
Types, Layouts, and Approaches
Choose LED layouts that serve the moment: a 16:9 hero wall for story content, flanking towers for stage width, panoramic banners for ambience, and dance-floor facades for DJ energy. Select indoor pixel pitch around 2.6–3.9 mm; use higher-brightness, weather-rated cabinets outdoors.
Common choices for weddings:
- Hero wall (16:9): 16–24 ft wide for cinematic motion content, engagement photos, and animated name moments (rendered in visuals, not text stickers).
- Panoramic banner (32:9 or 48:9): 30–40 ft ribbon behind the head table—ideal for gradients, slow patterns, and lyrical cues during speeches.
- Flanking towers (9:16 each): Two to four vertical stacks extend stage width and let you place motion alongside the couple without blocking faces.
- DJ facade / riser wrap: LED tiles on the booth or riser sync with dance-floor lighting for afterparty energy.
- Outdoor procession carts: Weather-rated 4.8–5.9 mm displays for baraat route cues or live feeds.
Choosing layouts by wedding moment
- Baraat: Mobile, bright, weather-rated displays with readable motion graphics.
- Sangeet: 16:9 hero wall with performance-friendly framing and clean sightlines.
- Reception: Panoramic banner and flanking towers that extend the stage visually without overpowering decor.
- Afterparty: DJ facade wrap with bass-reactive motion linked to lighting chases.
Aspect ratio math, simplified
- 16:9: Classic video (1920×1080, 3840×2160). Easy content sourcing and editing.
- 32:9: Ultra-wide canvas; great for ambient gradients and particle systems.
- 9:16 towers: Vertical motion textures; keep detail large to avoid aliasing at distance.
When a layout stretches the room, lighting must match. Our production design overview explains how scenic, lighting, and LED visuals work as one system.
Best Practices for LED Panel Design in 2026
Start with sightlines and safety, then pick pixel pitch. Keep nit levels modest indoors, storyboard every segment, test camera flicker, and lock a cueing plan with the DJ/MC and lighting director. Build redundancy for power and data.
- Viewing distance first: Minimum comfortable distance in feet ≈ pixel pitch (mm) × 3–4. A 2.6 mm wall looks clean from ~9–12 ft.
- Balanced brightness: Indoors: 800–1,200 nits blends with uplighting; outdoor sun: 3,500–5,000 nits plus hoods.
- Safe rigging: Verify truss ratings, point loads, safety cables, and fall protection; ground support where ceilings limit.
- Content palette: Soft gradients, tasteful patterns, and motion matched to 100–120 BPM for dance sets.
- Camera checks: Confirm 1,920–3,840 Hz refresh and match shutter angles to avoid banding.
- Cueing unity: One caller triggers MC mic, music, lighting, and wall together.
Safety and compliance checklist
- Document rigging plan with point loads and safety factors; include stamped drawings where required.
- Protect egress paths; keep 36 inches minimum clearance behind walls for service access.
- Label circuits; balance phases to reduce nuisance trips and noise on audio lines.
- Confirm venue rules for special effects (cold sparks, low fog) well before rehearsal.
Content do’s and don’ts
- Do: Use slow gradients and clean motion; limit pure white to preserve camera headroom.
- Don’t: Layer small high-contrast patterns that shimmer at distance; avoid strobe-like flashes during dinner and speeches.
Coordination with entertainment
- Build a single cue stack with the DJ/MC so speeches, entrances, and transitions feel intentional.
- Use timecode or verbal calling depending on show complexity and crew size.
- Rehearse 10–15 minutes of key moments; make notes for on-the-fly adjustments.
Local considerations for Midland
- Ballrooms in Midland can vary ceiling heights. Plan panel counts around lower trims so camera frames stay below seam lines.
- Summer humidity can affect outdoor receptions. Choose weather-rated cabinets and maintain airflow for processors.
- Confirm venue policies for special effects. Many sites ask for prior approval for cold sparks or low fog before the walkthrough.
Tools, Specs, and Resources
Use a structured toolkit: a venue intelligence checklist, panel map calculator, power/rigging worksheet, content storyboard, and rehearsal script. Together, these prevent last‑minute compromises and ensure your wall looks intentional in every scene.
We validate capacity, rigging, and power before anything is booked using our internal venue intelligence workflow. Then we document nit targets, pixel maps, input resolutions, and operator cues. We also prepare contingency tiles (5–10% of the build), spare PSUs, and replacement data cables. This dovetails with our event logistics process so you have one plan, one timeline, and one show caller.
| Spec | Indoor Wedding | Outdoor Event |
|---|---|---|
| Pixel pitch | 2.6–3.9 mm | 3.9–5.9 mm |
| Brightness (nits) | 800–1,500 | 3,500–5,000 |
| IP rating | IP20 | IP54–IP65 |
| Refresh rate | 1,920–3,840 Hz | 1,920–3,840 Hz |
| Power planning | Dedicated 20 A circuits; phase balance | Generator or distro; voltage drop checks |
Mid-article planning help: Want a wall that integrates with DJ, MC, lighting, and special effects? Our integrated team designs the show as one system so every cue lands together. Explore our production design approach.
Case Studies and Examples
Great LED design blends culture, story, and logistics. These snapshots show how panel choices, content, and cueing shape the mood—without stealing focus from the couple.
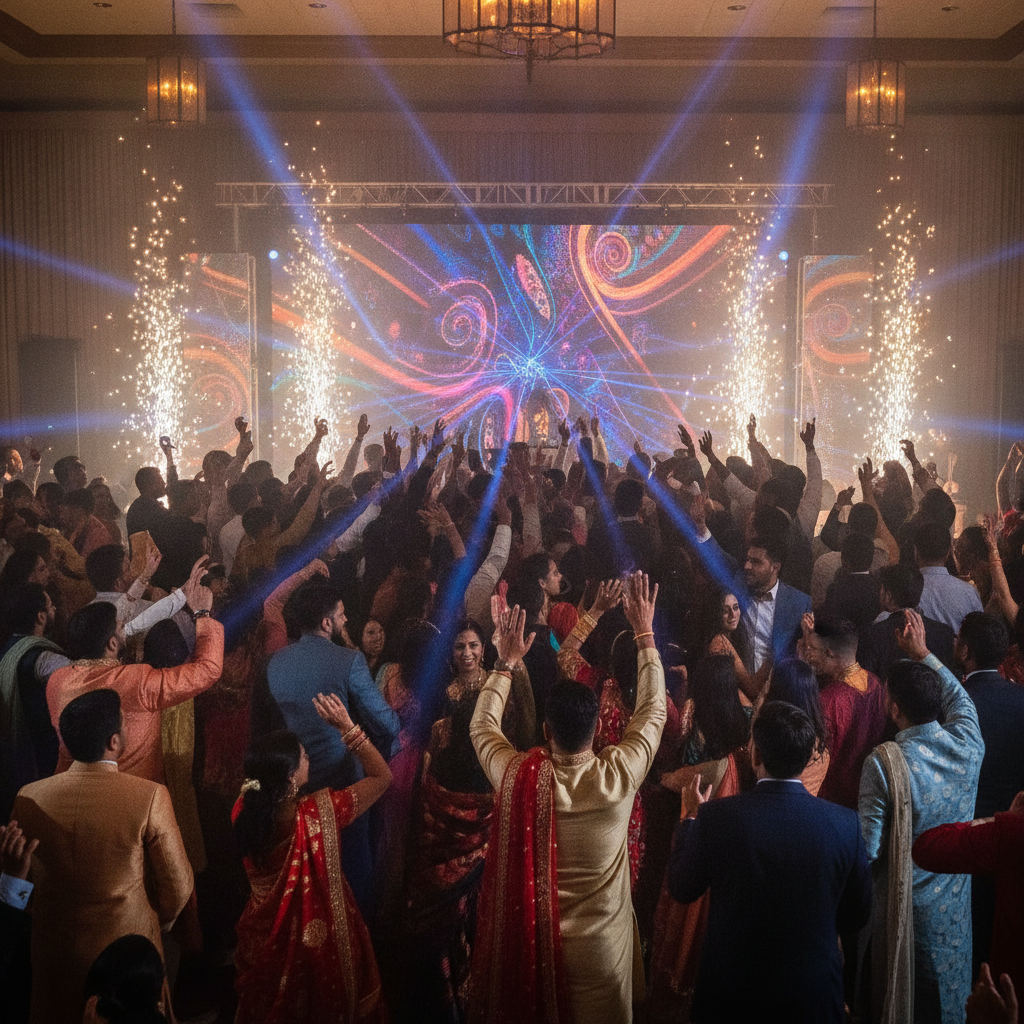
- Sangeet stage, Midland ballroom: A 24×13 ft 2.6 mm hero wall in 16:9 hosted family performances. We capped brightness at ~900 nits to match uplighting and set content at 59.94 fps for clean cameras.
- Reception panorama: A 36×7 ft 32:9 banner framed the head table with slow gradients and animated motifs. Towers flanked the DJ booth to extend light looks across the dance floor.
- Outdoor baraat support: Weather-rated 4.8 mm carts provided route cues and title cards. Brightness at ~4,000 nits stayed legible in open shade, with hoods for short sun exposures.
- Afterparty facade: The DJ riser wrap used 3.9 mm tiles with bass-reactive visuals. We kept peak whites under 90% and synced lighting chases at 120 BPM for a cohesive feel.
- First dance focus: We dimmed the wall to ~30% and pushed a warm gradient, allowing photographers to expose for faces while the room glowed.
- Speech clarity: Abstract particles at a slow drift minimized distraction behind toasts while keeping the stage alive.
- Live camera moments: A split-input processor enabled a picture-in-picture feed during the entrance without re-mapping the wall.
- Quick flip to performance: Pre-built cues transitioned from dinner ambiance to high-energy motion in under two seconds.
- Venue with low trims: Ground support at 12 ft with a 16 ft width preserved sightlines and camera framing.
- Mixed indoor/outdoor weekend: One content package adapted to both IP20 indoor tiles and IP54 carts by adjusting brightness and contrast presets.
- Modern-meets-tradition: Animated motifs inspired by regional patterns layered subtly over ambient gradients for a contemporary yet respectful feel.
- Unified show control: One caller cued MC lines, DJ drops, lighting looks, and visuals so nothing felt improvised.
Frequently Asked Questions
Couples ask about pixel pitch, brightness, safety, and content. Here are quick, direct answers that help you choose the right wall and avoid common pitfalls.
What pixel pitch is best for a wedding ballroom?
For most indoor ballrooms, 2.6–3.9 mm balances clarity and value. If guests are closer than 10 feet, lean toward 2.6 mm. If the wall sits farther back, 3.9 mm often looks clean and camera-friendly.
How bright should an LED wall be indoors?
Around 800–1,200 nits fits most stage lighting looks. Set peak white to ~85–90% so photographers retain highlight detail. Match ambient lighting to keep faces natural and reduce eye strain.
Do LED walls interfere with cameras?
They can if refresh rates and shutter don’t align. Choose panels at 1,920–3,840 Hz and set cameras to compatible shutter speeds to avoid banding. Avoid full‑white frames that can clip quickly.
What safety checks matter most?
Confirm rigging capacity, safety cabling, power distribution, and venue rules for effects like cold sparks or low fog. Build redundancy for data and power, and keep clear egress paths around the wall.
Can we use LED walls outdoors for a baraat?
Yes—use weather-rated cabinets (IP54–IP65) at higher brightness (3,500–5,000 nits). Add hoods for direct sun, and secure stable power via generator or venue distro. Keep displays mobile and sightline-friendly.
Conclusion and Next Steps
The best LED panel design starts with the room, aligns content and camera, and integrates with DJ, MC, lighting, and effects. When one team owns the showflow, every moment lands and nothing feels improvised.
Here’s how to move forward with confidence:
Key takeaways
- Viewing distance sets pixel pitch; nit levels match ambient lighting.
- Plan rigging and power early; preserve egress and service access.
- Storyboard content for each wedding moment; avoid pure white frames.
- Rehearse cues with DJ, MC, lighting, and LED ops in one stack.
- Carry redundancy: spare tiles, PSUs, and dual data runs.
Action steps
- Walk your venue in Midland and measure trims, throw distances, and sightlines.
- Sketch panel maps that match 16:9, 32:9, or tower layouts to your stage.
- Define content palettes for sangeet, reception, and afterparty energy.
- Align entertainment and production using one integrated cue plan.
Ready to design an LED wall that elevates every moment? We can build your wall, lighting, and entertainment as one cohesive experience—backed by a structured logistics plan so you can be fully present.
One Response